REVIEW · VALLETTA
World War II Malta Full-Day Walking Tour
Book on GetYourGuide →Operated by Supreme Travel Limited · Bookable on GetYourGuide
Malta’s WWII scars sit in plain sight. This full-day World War II Malta walking tour connects the siege to the streets you see today, with standout stops at Fort St Elmo and the Air Raid Shelters, plus major memorials and harborside viewpoints. I like how the guide frames Malta’s role between 1940 and 1942 so the history clicks, not just memorizes. I also like that the route mixes tense underground spaces with quiet places to reflect.
One possible drawback: with a 7-hour day packed with entrances, memorials, and viewpoints, the time at each stop can feel tight if you like to linger or read every panel slowly. Plan your expectations for a guided “hit the key moments” day, not a slow museum marathon.
In This Review
- Key things I’d put on your radar
- Why this WWII Malta day works better on foot than by taxi
- The siege story: how Malta became the prize (and the target)
- Vittoriosa and the Valletta front line: gates, scars, and survival
- Fort St Elmo and the air defenses you can walk through
- Lascaris War Rooms: command decisions under the ground
- Memorial stops: remembering the air war and the sea war
- The practical pacing: where you’ll feel rushed and where it helps
- Price and value: is $71 a fair deal for this day?
- Should you book this WWII Malta full-day walking tour?
- FAQ
- How long is the World War II Malta full-day walking tour?
- What is included in the price?
- Is lunch included?
- What should I bring?
- Is this tour suitable for people with mobility impairments?
- What language is the tour guide speaking?
- How does cancellation work?
- Quick decision checklist
Key things I’d put on your radar

- Fort St Elmo + Air Raid Shelters: real structures built for real danger.
- Commonwealth aircrew memorial: a sobering stop tied to RAF losses (2,298 names honored).
- Valletta landmarks with WWII scars: places like the former Royal Opera House bomb site and the George Cross square.
- Victory Kitchens and ration-era survival: a practical angle on hardship, not only battles.
- Lascaris War Rooms underground complex: you learn where Malta’s air defense decisions were made.
- Siege Bell and Great Harbor views: remembrance with a strong line of sight over Valletta.
Why this WWII Malta day works better on foot than by taxi
Malta in WWII isn’t an abstract lesson. It lives in stone walls, old gates, harbors, and the shape of streets that still funnel your view the way it once did. Walking this route helps you “place” the war. You stop looking at maps and start feeling how the city connects to the sea.
You’ll move through two key areas: Vittoriosa and Valletta. That pairing matters. Vittoriosa brings you closer to the harbor world and the feel of Mediterranean naval pressure, while Valletta gives you the monumental “nerve center” side—where symbols, memorials, and command decisions cluster.
I especially like that the tour doesn’t treat WWII as one long list of dates. It links events to geography: why Malta mattered, how air defense and naval battles played out, and why civilians still had to survive bombings and shortages while the military fought overhead.
You can also read our reviews of more walking tours in Valletta


The siege story: how Malta became the prize (and the target)
The core of the tour is understanding why Malta was so valuable. Between 1940 and 1942, Malta sat on a crucial Mediterranean line. If the Allies could use it to attack Axis ships, they could disrupt the supplies that kept campaigns moving in North Africa. If Malta fell, the supply situation for the Axis would tilt badly.
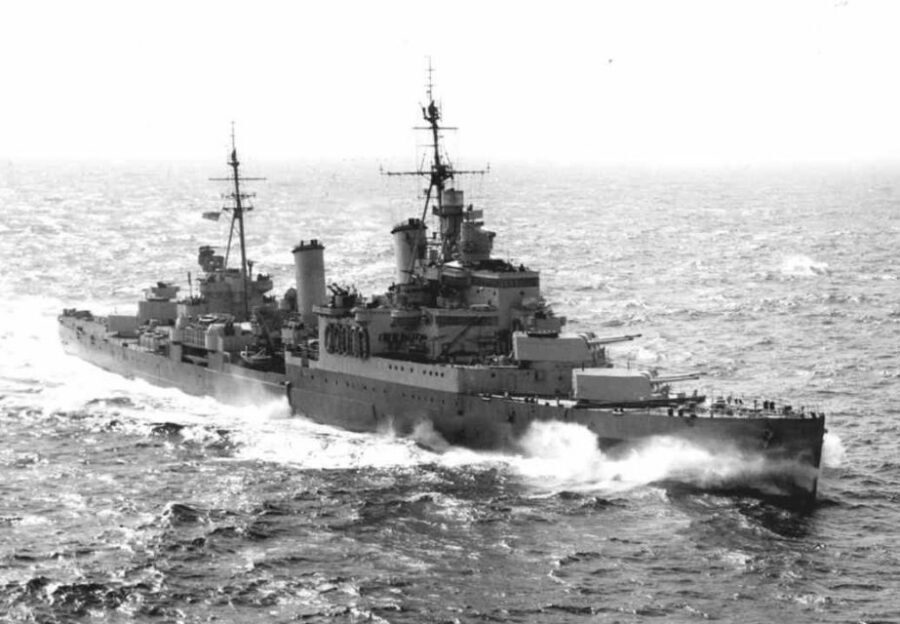
You’ll hear how the air and sea fight wasn’t just background noise. Malta’s situation forced constant pressure: Axis air forces and navies against the Royal Air Force and Royal Navy. When the war front shifted in North Africa around mid-1940, Malta’s value increased even more, because attacking supply routes became even more decisive.
General Rommel recognized the island’s importance and warned that without Malta the Axis would lose control of North Africa. That logic helps you understand why the tour keeps returning to harbors, gates, and fortified edges: control of Malta wasn’t only about buildings. It was about controlling movement by sea and air.
And because the tour is guided, you get the “why” while you’re looking at the “what.” That makes it easier to remember later.
Vittoriosa and the Valletta front line: gates, scars, and survival
A big chunk of your day centers on Valletta’s defensive and symbolic front. You’ll pass through or near key elements like Porta Reale, a curtain wall in the center of the Valletta Land Front. Seeing these fortifications in daylight changes how you read them on postcards. They stop being “nice old walls” and start feeling like a plan.
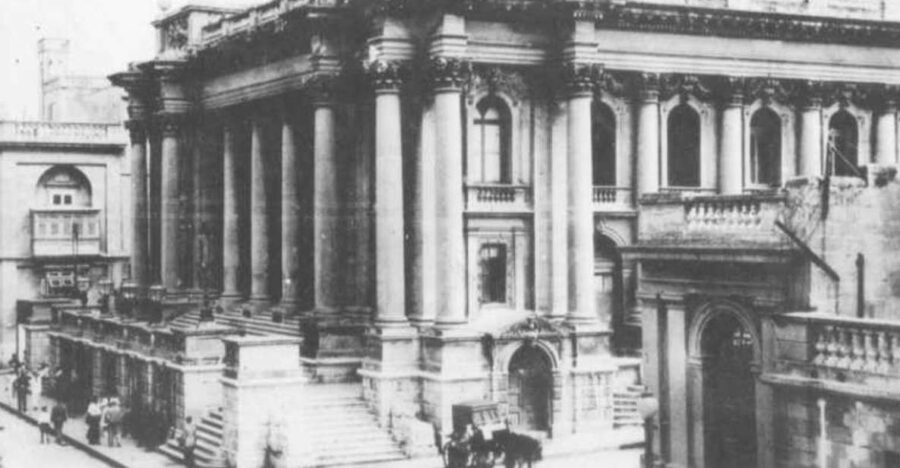
You’ll also hit Pjazza Teatru Irjal, the former Royal Opera House site that was heavily bombed in 1942. This is one of those moments where history stops being military-only. The war reached civilian life hard, and the city remembers it.
From there, you’ll walk through streets such as Strada Stretta and reach Misrah San Gorg (St. George’s Square), tied to Malta receiving the George Cross in 1942. That’s a powerful waypoint because it acknowledges the cost to civilians and the bravery tied to survival under siege.
Next comes Republic Square and the Queen Victoria Statue, plus a stop connected to Victory Kitchens—community kitchens set up to reduce food waste during shortages. I like this angle. It adds texture. WWII isn’t only aircraft and ships; it’s also feeding people while supplies get squeezed.
In practical terms, these stops are also good for orientation. Valletta can feel like a maze at first. This route gives you a guided thread—where to look, what to notice, and how the pieces connect.
Fort St Elmo and the air defenses you can walk through
When the tour gets into Fort St Elmo and the Air Raid Shelters, the day turns from “story” into “structure.” Forts and shelters are built for time, pressure, and fear. Even if you’re not a hardcore history fan, walking through these spaces makes the siege feel physical.
Fort St Elmo is one of the big Valletta-area fortifications tied to the fighting for control. You’ll learn how Malta’s defenses had to respond to waves of aerial and naval threats, not one clean battle. That context matters because it helps you understand why Malta needed both visible defense and protected spaces.
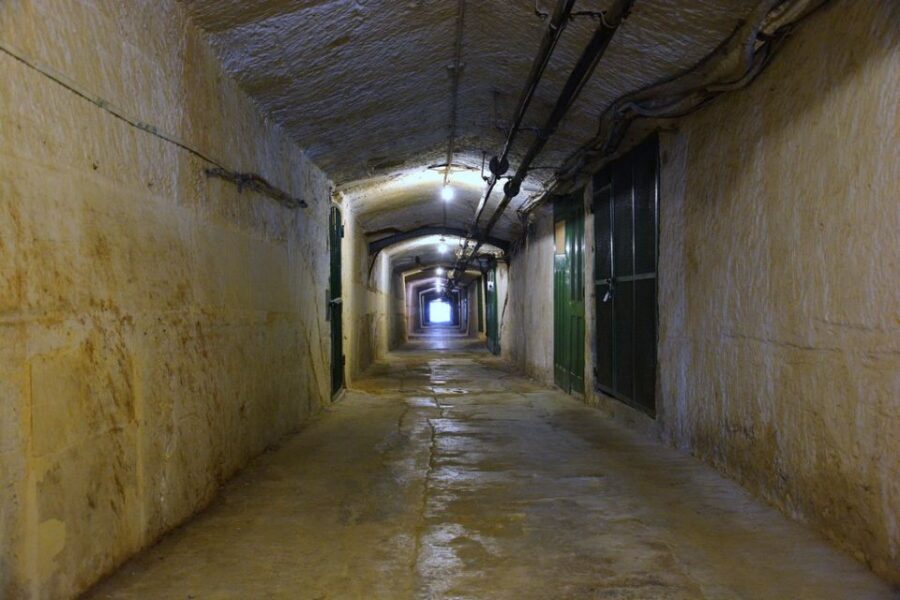
The Air Raid Shelters add a different kind of realism. You’re not just reading about bombings. You’re in the underground world where people tried to survive them. I’ve found that this is where the guided explanation really earns its place, because you can’t fully understand the shelter’s purpose just by looking at it—you need the story of how it was used.
One more note: your schedule is tight by design. A few stops depend on the pace of entrances and walk time between sites, so if you’re hoping for long, slow exploration of every corridor, you may want to plan extra time on a separate day.
Lascaris War Rooms: command decisions under the ground
Another standout is the underground complex known as the Lascaris War Rooms. This is the part of the tour where you learn how decisions were made, not just what happened afterward. You’ll hear that Malta’s air defense was coordinated here, along with the kind of planning connected to Mediterranean sea battles.
What I like is the sense of continuity between Malta’s siege and later operations. The War Rooms were where top allied commanders directed aspects of the Invasion of Sicily in 1943, including figures such as General Eisenhower, Admiral Cunningham, Field Marshal Montgomery, and Air Marshall Tedder. Even if Sicily isn’t on your immediate travel plan, the connection helps you see Malta as a strategic hub, not a forgotten footnote.
Walking through an underground command space also changes how you interpret the city above. Valletta starts to feel like more than a scenic capital. It becomes a surface layer for decisions made below ground during intense pressure.
Because this part is underground, wear shoes you trust. You’ll likely spend time dealing with stairs and uneven surfaces, so comfortable footwear is not optional.
A few more Valletta tours and experiences worth a look


Memorial stops: remembering the air war and the sea war
This tour doesn’t rush past remembrance. It builds in moments where you stop and pay respects, which is meaningful in a place shaped by loss. One of the most striking memorial elements is the RAF Monument honoring the 2,298 Commonwealth aircrew who lost their lives in WWII air battles. The number alone hits hard, and the guided context helps it land as people, not statistics.
You’ll also make your way toward the Santa Marija Memorial, an anchor-shaped monument connected to Operation Pedestal. This is tied to the sailors who faced a brutal challenge because Malta needed supplies desperately. Standing near a harbor-linked memorial after learning about Malta’s supply role gives the day a strong emotional through-line.
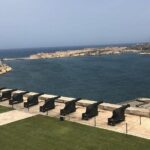
Another memorable viewpoint moment comes at Upper Barracca Garden, where you’ll see statues including Winston Churchill and other prominent men. It’s a place to look out and connect the present-day view with the historical one—ships moving through the same water, the same pressure point, different names on the story.
Then there’s the Siege Bell Memorial, built in 1992 to honor the 7,000 people who lost their lives during the Siege of Malta. You get an overlook of Valletta Harbor, and that matters. Remembrance with a view makes it harder to treat the topic like a lecture.
The practical pacing: where you’ll feel rushed and where it helps
A guided day has a tradeoff. You get clarity and access, but you don’t get to stretch each stop into a personal research trip. Some people love that structure. Others feel it’s too fast, especially at the underground sites.
I’d plan around the idea that you’ll get a solid overview at each major location, with guided explanation doing the heavy lifting. If you’re the type who wants to read every sign, you might feel the pinch—particularly if the museum portion is self-paced on your day. The good news is that tickets are included, so if you finish with energy, you can often choose what to revisit on your own later.
Also, listen carefully for audio. If your spot on the bus is far from the guide, you might catch less detail. A simple fix: sit where you can hear and don’t expect every comment to carry well across a full group.
The plus side of a packed schedule is that by the end of seven hours, you’ve built a mental map. You’ll know where to stand for the harbor, which fortifications matter, and why Malta’s WWII story is tied to supply routes and air defense—not just combat headlines.
Price and value: is $71 a fair deal for this day?
At $71 per person for a 7-hour experience, the best way to judge value is by what you’re not paying separately. Your tour includes pickup and drop-off, a licensed local guide, tickets for Air Raid Shelters, and a ticket to the Malta War Museum. Fort St Elmo entrance is also part of the experience.
That matters because WWII sites can add up once you’re already in Malta and trying to piece everything together. Here, you’re getting transport support, guided interpretation, and entry access in one day.
Is it still a choice-based expense? Yes. If you already know Valletta well and want a slow self-guided day, you might spend less on your own admissions. But if you want someone to connect the dots—between shelters, command rooms, memorials, and the siege story—this price feels more like paying for understanding than for tickets.
You should also be aware that lunch is not included, so budget a meal or snack stop you can tolerate. That’s a small planning point, but it affects the day’s comfort level.
Should you book this WWII Malta full-day walking tour?
Book it if you want a guided overview that hits the key WWII locations in Valletta and Vittoriosa, and you’re keen on the contrast between forts, shelters, and memorial spaces. You’ll likely enjoy it most if you like your history grounded in place, and you don’t want to figure out which sites matter and why while you’re also navigating the city.
Skip it (or add time) if you hate tight schedules or you want long independent reading time at every stop. This style works best as a “learn the essentials now, explore further later” day. It’s also not ideal if you have mobility limitations, since it’s not set up for mobility impairments.
If you’re nervous about taking on WWII history without support, this tour is a confidence boost. You get structure, context, and a route that keeps you moving through the right places in the right order.
FAQ
How long is the World War II Malta full-day walking tour?
The tour lasts 7 hours.
What is included in the price?
It includes pick-up and drop-off from your hotel or nearest point, a licensed local guide, a ticket to the Air Raid Shelters, and a ticket to the Malta War Museum.
Is lunch included?
No, lunch is not included.
What should I bring?
Wear comfortable shoes.
Is this tour suitable for people with mobility impairments?
No, it is not suitable for people with mobility impairments.
What language is the tour guide speaking?
The tour is in English.
How does cancellation work?
You can cancel up to 24 hours in advance for a full refund.
Quick decision checklist
If your ideal Malta day mixes Fort St Elmo, underground WWII spaces, and harborside memorial viewpoints—and you’re okay with a packed schedule—this is a strong choice. If you want slow pacing and lots of free, unstructured time in each site, plan to add your own follow-up visits after the tour.